None of These Cost More Than $15. All of Them Have Saved Real Gear in the Northern Michigan Backcountry.
FIELD TESTED Updated March 2026
I once lost an entire day of footage on the Manistee River Trail because of a single puddle — my SD card case had cracked in my pocket, the card slipped out during a gear reshuffle, and I didn’t notice until I was back at camp. Everything from that morning’s wildlife shoot was gone.
Knowing how to protect camera gear hiking costs less than a cup of coffee. Not knowing costs you the whole shoot.
That’s the thing about gear failures in the backcountry — they almost never happen because you bought the wrong $800 camera. They happen because of the $5 problem nobody bothered to solve before heading out.
These five cheap tech gadgets aren’t exciting. They’re not going to win any gear review awards.
But after years of field testing cameras, drones, and outdoor tech in Northern Michigan — from the sand dunes of Ludington State Park to the Pictured Rocks shoreline and deep into Manistee National Forest — every single one of them has earned a permanent spot in my pack.
Total cost for all five: under $50. Total amount of expensive gear they’ve protected: considerably more.
Running a camera setup in the field? Our Jackery Explorer 1000 V2 vs EcoFlow Delta 2 comparison covers base camp power for keeping all your gear charged on extended trips.
And if you’re heading deep into the backcountry, our ultralight satellite survival kit guide covers the safety gear that should be in your pack alongside your camera kit.
TL;DR — How to Protect Camera Gear Hiking: 5 Cheap Fixes
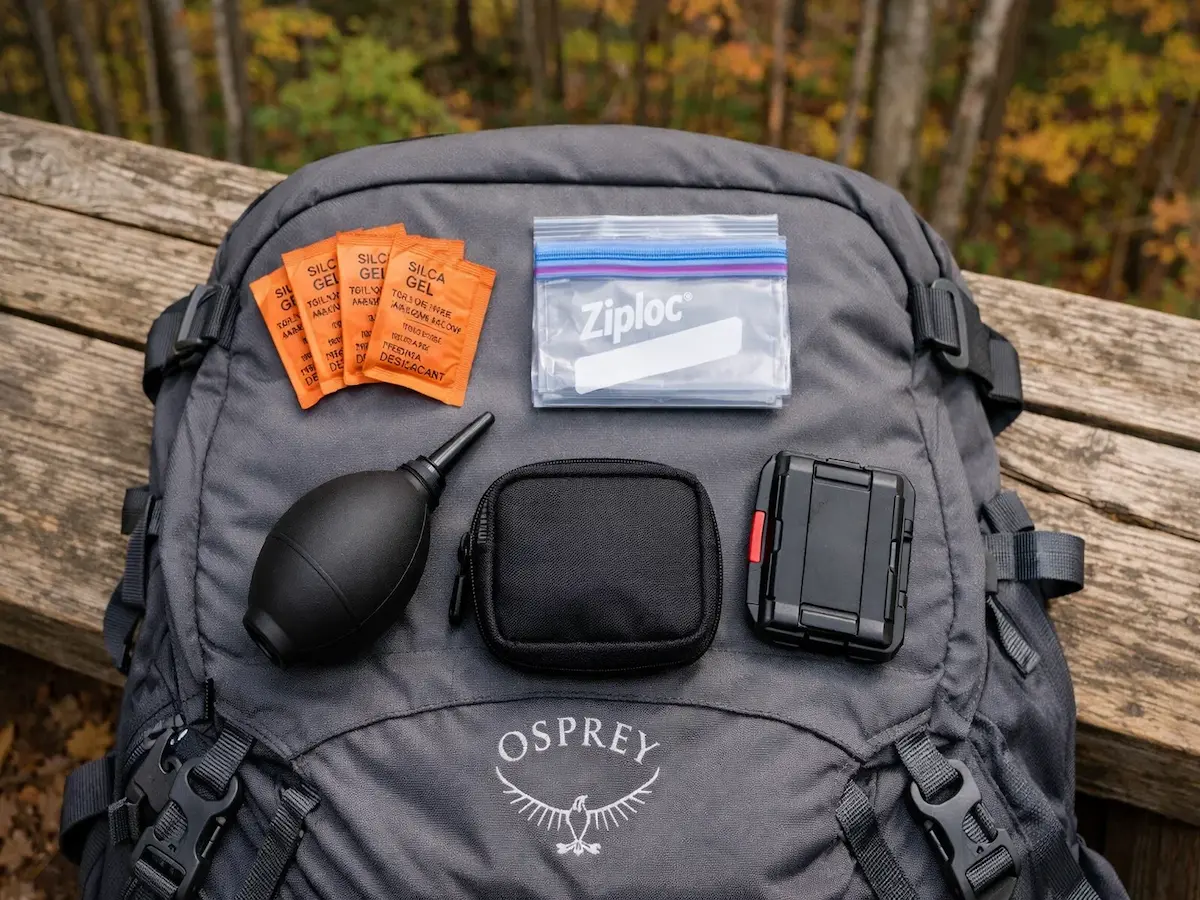
The 5 Gadgets — Field Notes from Northern Michigan
Reusable Silica Gel Packets — The Moisture Sponge
UNDER $10
You finish a hike in humid or rainy conditions, toss your camera or drone into your pack, and pull it out the next morning to find fogged lenses or — worse — internal condensation on the sensor. In Northern Michigan’s late-season humidity, this happens faster than you’d expect. It happened to me with a DJI drone after a wet Pictured Rocks shoot, and the moisture sensor in the battery compartment triggered a lockout that took two days to clear.
Keep a handful of reusable silica gel packets in your gear bag at all times. They cost pennies, weigh nothing, and act as a moisture sponge for everything stored alongside them. The reusable kind can be recharged in the oven — spread them on a baking sheet at 250°F for an hour and they’re back to full absorption capacity. Keep two or three loose in your camera bag and one inside any hard case you’re storing overnight. This is the single cheapest and most effective piece of preventative maintenance in backcountry photography.
💡 OTL Pro Tip: If you’re flying a drone in humid conditions, drop a silica packet directly into the battery bay overnight after your shoot. Moisture in battery contacts is one of the most common causes of DJI sensor warnings that have nothing to do with an actual battery problem.
Vbeijll Color-Indicating Silica Gel Packets (50-Pack)
⭐ 4.7/5 (2,018 reviews) · Orange→dark green indicator · Food grade · Rechargeable · 7K+ bought last month
The DIY Ziploc Rain Sleeve
UNDER $5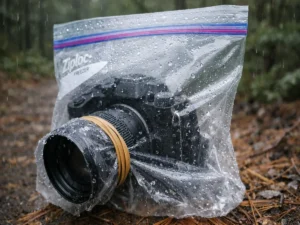
You’re in a light drizzle or heavy spray — shooting a waterfall, a river crossing, or just a Michigan afternoon that turned without warning. You don’t have a $100 dedicated rain cover, your camera isn’t fully weather-sealed, and the rain isn’t stopping. Every minute you spend sheltering the camera is footage you’re not getting.
A heavy-duty gallon-sized Ziploc bag with a hole cut for the lens, secured with a rubber band. It looks ridiculous. It works completely. The bag covers the body and controls while the lens element stays exposed through the hole — you can still operate every button and dial through the plastic, and the rubber band creates a seal around the lens barrel tight enough to stop spray and light rain. Keep two in your pack at all times. They weigh nothing, cost pennies, and have rescued shoots in conditions where stopping simply wasn’t an option.
💡 OTL Pro Tip: Use the freezer-grade Ziploc bags — they’re thicker than standard and the double zipper seal means the opening around your hand stays tighter. Pre-cut your lens hole at home with scissors and test the rubber band fit on your specific lens before the trip.
Handheld Air Blower — The Lens Blower Rule
UNDER $10Dust or sand lands on your lens element. Your instinct is to wipe it off — with your shirt, a corner of your jacket, even a lens cloth without blowing first. One wipe with a single grit particle caught between the cloth and the glass is all it takes. The lens coating is scratched permanently. There’s no fix. The lens is compromised for every shot you take from that point forward.
A Foto Tech-style handheld bulb air blower — a small rubber squeeze blower that costs under $10 and fits in any pocket. The rule is absolute: never touch glass until the dust is gone, and the only way to safely remove grit before wiping is a blast of air. You squeeze the bulb, the air lifts the particle off the glass surface, and then — and only then — you follow with a lens cloth in gentle circular motions. This is non-negotiable field practice for anyone shooting with glass worth protecting. It also works for sensor cleaning in a pinch, though that’s a gentler technique.
💡 OTL Pro Tip: Never use canned compressed air on a camera lens or sensor in the field — the propellant can spray liquid under pressure and leave residue. The manual bulb blower is the only safe field option. Keep it clipped to the outside of your camera bag so it’s the first thing you reach for, not the last.
Foto&Tech Silicone Rubber Dust Blower with Soft Nozzle
⭐ 4.4/5 (49 reviews) · Soft silicone — won’t scratch glass · No batteries · No propellant residue · Compact field carry
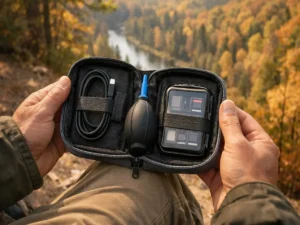
Zippered Tech Pouch — The Cable Tamer
UNDER $15You lose a proprietary charging cable in the woods — or your pack becomes a chaotic nest of tangled wires and you spend 20 minutes at the trailhead digging for the one USB-C cable that fits your camera while the light disappears. Worse: you arrive at camp and realize your backup SD card is somewhere in the main pocket mixed in with snacks, a headlamp, and a rain layer. The shoot doesn’t happen.
A dedicated small zippered tech pouch — one pouch, always in your pack, containing exactly these items: your camera’s charging cable, a multi-port wall plug, your backup SD card, and any adapter you use regularly. Nothing else goes in. If it’s not in the pouch, it doesn’t come on the trip. The discipline of a single dedicated pouch eliminates the entire category of “I had it at home but couldn’t find it in the field” problems. At under $15, a decent nylon pouch with internal elastic loops is all you need — nothing fancy.
💡 OTL Pro Tip: Label your charging cables at both ends with a small piece of colored electrical tape — one color per device. In low light at camp, you’ll find the right cable in three seconds instead of three minutes. This is especially valuable if you’re running multiple devices with similar USB-C connections.
FYY Electronic Organizer Travel Cable Bag — Medium
⭐ 4.5/5 (36,490 reviews) · Waterproof oxford exterior · Double-layer interior · 8.3″ x 5″ x 2.6″ · 5K+ bought last month
Hard-Shell SD Card Case — The $8 Fix
UNDER $10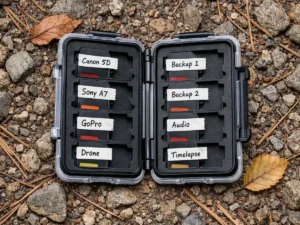
You drop your SD card on a rocky trail. It bounces into a crevice between two boulders. Or it’s sitting loose in your pocket and gets crushed by your keys. Or — as happened to me on the Manistee River Trail — it simply slips out of a cracked cheap case during a gear reshuffle and you don’t notice until you’re back at camp and a full morning of wildlife footage is gone with it. SD cards are small, expensive to lose, and completely unprotected in their default state.
A hard-shell plastic SD card holder — typically holding 8–24 cards in a case the size of a credit card, made of impact-resistant polycarbonate with a secure latch. These are dirt cheap, genuinely waterproof, and provide the two things a loose SD card has none of: crush protection and loss prevention. Once your card is in a labeled slot in a hard case that lives in your tech pouch, the entire category of SD card disasters disappears. This is the fix I should have had before the Manistee shoot. It costs less than a coffee and protects days of footage.
💡 OTL Pro Tip: Use a label maker or a strip of white tape on each SD card slot and mark it with your device name and card speed. When you’re swapping cards at a trailhead with cold hands, knowing exactly which slot holds your backup card for your camera versus your drone is the difference between a clean workflow and a fumbled swap that costs you the shot.
Kiorafoto IPX5 Water-Resistant Hard-Shell SD Card Case (12 SD + 12 Micro SD)
⭐ 4.8/5 (11,404 reviews) · Polycarbonate exterior · Molded rubber interior · Snap-lock closure · Carabiner eyelet · 500+ bought last month
Gear Worth Protecting — OTL Field-Tested Picks
Now that your gear is protected, make sure the gear itself is worth the effort:
• DJI Osmo Pocket 3 vs GoPro Hero 13 — the two best hiking cameras in 2026, field tested in Northern Michigan
• DJI Osmo Action 5 Pro vs GoPro Hero 13 — action camera matchup for adventure and watersports
• Garmin Enduro 3 vs Suunto Vertical — GPS watches for tracking your backcountry shoots by route and elevation
• Ultralight satellite survival kit — backcountry safety gear that belongs in any pack alongside your camera kit
• Jackery Explorer 1000 V2 vs EcoFlow Delta 2 — base camp power for charging everything after a full day of shooting
• Jackery 300 vs EcoFlow River 3 — compact power station comparison for lighter day-trip setups
• Best rechargeable headlamps for camping — essential for packing and unpacking gear after dark
Camera Gear Care & Backcountry Resources
References we use when evaluating gear protection and backcountry preparedness standards.
- Huron-Manistee National Forests — USFS
Official conditions and trail information for Northern Michigan — where OTL conducts all extended field gear evaluations. - Leave No Trace (LNT) Center for Outdoor Ethics
Guidelines for responsible outdoor recreation to ensure these backcountry areas remain protected for future explorers.
✅ What Each Hack Does Well
- Silica gel — absorbs up to 35% of its own weight in moisture passively, no action required
- Ziploc rain sleeve — covers full camera body and all controls for under $5, works on any camera
- Air blower — removes grit without contact, the only way to prevent permanent lens coating scratches
- Tech pouch — one dedicated location eliminates the “lost cable in the field” problem entirely
- SD card case — IPX5 water-resistant, crush-proof polycarbonate holds 24 cards for under $10
⚠ Limitations to Know Before the Trail
- Silica gel packets over 5g must be kept isolated from direct food contact — check packet labeling before storage use
- Ziploc rain sleeve does not survive submersion — not a substitute for a waterproof camera or dedicated rain cover in heavy sustained rain
- Air blower does not replace a microfiber cloth — removes loose grit only, a cloth wipe still needed after blowing
- Tech pouch discipline requires consistency — only works if everything returns to the pouch after every use
- SD card case adds minor bulk — about the size of a credit card, but some ultralight packers will notice the addition
OTL Bottom Line
Expensive gear fails in the backcountry for cheap reasons. A fogged lens, a scratched element, a dropped SD card, a missing cable — none of these are interesting problems, and none of them require interesting solutions.
They require five items totalling under $50 that live in your pack permanently and never come out except to do their job.
Knowing how to protect camera gear hiking comes down to five items that total under $50 and live in your pack permanently.
The silica gel handles moisture. The Ziploc handles rain. The air blower handles dust before it becomes a scratch. The tech pouch handles the chaos. The SD card case handles the one gear loss that’s completely, entirely, embarrassingly preventable.
If you’re running a camera kit worth protecting — a mirrorless rig, a DJI drone, or any outdoor tech you’ve invested in — these five items belong in your pack before anything else goes in.
They cost less than a single replacement SD card and protect everything else on the list.
Pair them with the right navigation kit (our Garmin Enduro 3 vs Suunto Vertical comparison covers the best backcountry GPS watches) and you’ve got a complete, protected field kit.
Total Cost for All 5: Under $50
All available on Amazon. All field tested in Northern Michigan.
Check current pricing at the links below.
Gear Protection FAQ
How do I protect my camera from moisture in the backcountry?
The most effective and affordable solution is reusable silica gel packets stored inside your camera bag or hard case. They absorb ambient moisture passively and can be recharged by heating in an oven at 250°F for one hour. For active rain protection when shooting, a heavy-duty gallon Ziploc bag with a hole cut for the lens provides full body coverage at essentially zero cost. For cameras without weather sealing — including the DJI Osmo Pocket 3 — this DIY rain sleeve is a practical field solution that costs under $5 and can be prepared before any trip. If you regularly shoot in wet conditions, investing in a camera with native waterproofing like the GoPro Hero 13 Black eliminates the problem entirely.
What’s the safest way to clean dust off a camera lens in the field?
Always use a handheld bulb air blower before touching the lens with any cloth or tissue. The rule is absolute — never wipe glass until you’ve removed loose grit with air first. A single dust or sand particle dragged across a lens coating by a cloth will scratch it permanently, and lens coatings cannot be repaired. The bulb blower (Foto Tech style) costs under $10, fits in any pocket, and is the only field-safe way to dislodge particles before following with a circular microfiber cloth wipe. Never use canned compressed air on camera glass — the propellant can spray liquid residue under field conditions.
How do I stop losing SD cards on the trail?
A hard-shell polycarbonate SD card case with a secure latch is the complete solution. These cost under $10, hold 8–24 cards, are waterproof, and provide crush protection that a loose card in your pocket has none of. The key habit is pairing the case with a dedicated tech pouch — the card case lives in the pouch, the pouch lives in your pack, and nothing leaves the pouch loose. Label each card slot by device and speed so you can locate the right card at a trailhead with cold hands without fumbling. This system eliminates the entire category of SD card loss and damage that costs outdoor photographers significant footage every year.
What should I keep in my camera tech pouch for backcountry trips?
Keep exactly these items and nothing else: your camera’s charging cable, a multi-port wall plug, your backup SD card in its hard case, any proprietary adapters you use regularly, and a spare battery if your camera supports it. The discipline of a single dedicated pouch means you always know where these items are, you never leave them behind, and you never waste field time searching for them. A secondary pouch for lens cleaning — microfiber cloth, bulb blower, and lens wipes — is worth adding once you have the core cable pouch in place. Both fit inside any daypack side pocket.
Is a Ziploc bag actually effective as a camera rain cover?
Yes — a heavy-duty gallon freezer bag with a hole cut for the lens and secured with a rubber band is genuinely effective for light rain, spray, and waterfall mist. It covers the camera body and all controls, and you can operate buttons and dials through the plastic. It won’t survive submersion and it’s not a replacement for a proper rain cover or weathersealed camera in sustained heavy rain. But for the scenarios most outdoor photographers encounter — an unexpected afternoon shower, a spray-heavy waterfall shot, a wet paddle landing — it works completely. Keep two pre-cut bags in your pack at all times. They weigh nothing and cost cents.
Do silica gel packets actually work for camera gear?
Yes — silica gel is a desiccant, meaning it absorbs water vapour from the surrounding air passively and continuously. Placed inside a closed camera bag or hard case alongside your gear, it significantly reduces the ambient humidity that causes condensation on lenses and internal sensor components. The reusable kind is more cost-effective than single-use packets — they change color (typically from orange to green, or blue to pink, depending on the brand) when saturated, signalling it’s time to recharge them in the oven. For backcountry use in humid environments like Northern Michigan in summer or late fall, silica gel packets in your camera bag are one of the cheapest and most effective forms of preventative gear maintenance available.
This guide was last updated in March 2026 with field notes from Northern Michigan. Tested and written by Outdoor Tech Lab.


Leave a Reply